Next: Outbound Up: Functions Previous: Functions Contents
Call Groups
In this interface (Figure 4.79) it's possible to define answering groups, (i.e., a group of telephones which shall ring simultaneously when the access to the group is made). To define a group it is necessary to fill these fields:
Name: Name for the group;
Caller ID (Inbound): Possibility to use a specific inbound caller ID for this service;
Caller ID (Outbound): Possibility to use a specific outbound caller ID for this service;
Direct access: List of numbers/addresses that will call this service. We have three options and the possibility to use many direct accesses, it's also possible to choose one of the PSTN interfaces defined at: Telephony -> Interfaces;
DID: If the IPBrick has a ISDN telephony card, the PSTN DID (Direct Inward Dial) that will call this service needs to be inserted;
ANA: If the IPBrick has a analogic telephony card, will be the direct PSTN number that will call this service;
SIP: It's the specific SIP address that will call this service;
Caller IDs restriction: Will restrict the route only for the listed caller ID's;
Group Members
A user can be part of an access class if the configurations are made correctly.
Internal: Internal SIP phones that belong to the group;
External: External phones (SIP, PSTN number, etc) that belong to the group.
Voicemail enabled: Active by default (YES)
Personalized voicemail: Deactivated by default, this option enables the user to record a customized voicemail message.
Attendance seq.
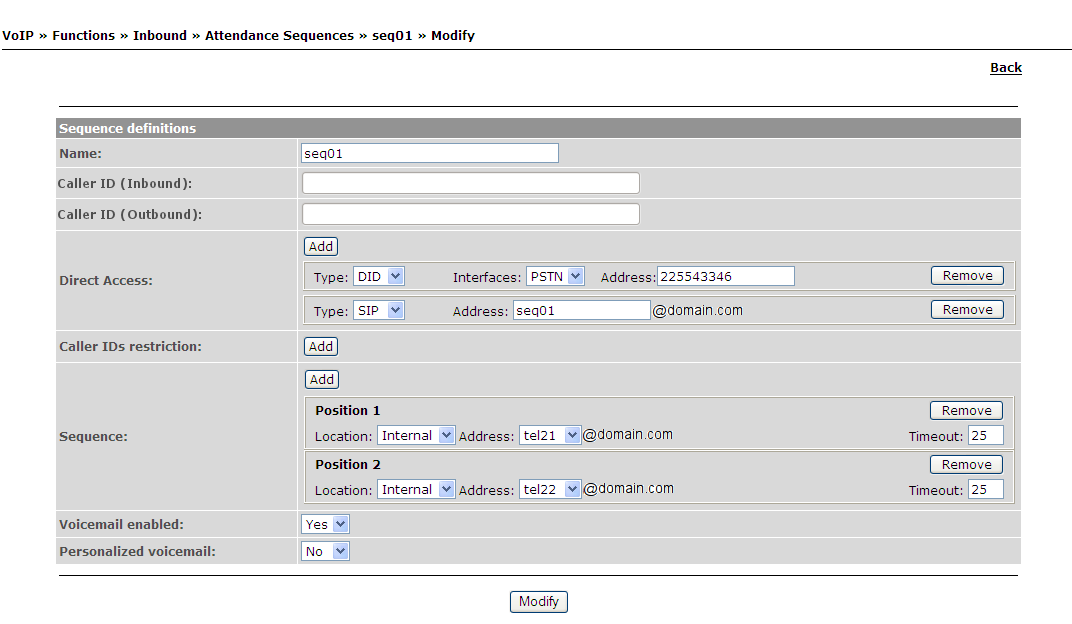
In this section it is possible to define an answering sequence, or see/change/remove the already defined sequences. To add a new sequence it is necessary to click Insert, define a name for the sequence, select if the voicemail is active or not and in Direct Access add the addresses DID/SIP/ANA of the telephones by which the sequence shall be activated.
If you intend to add a Direct Access for an extension defined in IPBrick, it is possible to choose SIP and select the extension in the address. In Sequence is possible to add the telephones which shall ring by the desired order and the time in which each one of them plays till the next one.
To define a attendance seq. it is necessary to fill (Figure 4.80):
Name: Name for the attendance seq;
Caller ID (Inbound): Possibility to use a specific inbound caller ID for this service (this field is optional);
Caller ID (Outbound): Possibility to use a specific outbound caller ID for this service (this field is optional);
Voicemail enabled: Enables the voicemail for the sequence;
Direct access:List of numbers/addresses that will call this service. We have three options and the possibility to use many direct accesses, it's also possible to choose one of the PSTN interfaces defined at: Telephony -> Interfaces;
DID: If the IPBrick has a ISDN telephony card, the PSTN DID (Direct Inward Dial) that will call this service needs to be inserted;
ANA: If the IPBrick has a analogic telephony card, will be the direct PSTN number that will call this service;
SIP: It's the specific SIP address that will call this service;
Caller IDs restriction: Will restrict the route only for the listed caller ID's;
Sequence positions
Location Internal: Internal SIP phones that belong to the sequence;
Location External: External phones (SIP, PSTN number etc) that belong to the sequence;
Timeout: Timeout in seconds, be default 25.
Voicemail enabled: Active by default (YES)
Personalized voicemail: Deactivated by default. If active this option enables the user to upload a customized voicemail message.
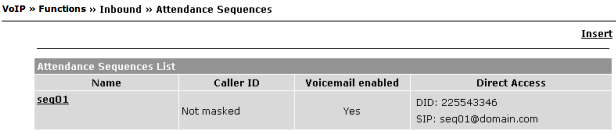
A attendance sequences list can be viewed at Figure 4.81.
IVR Attendance
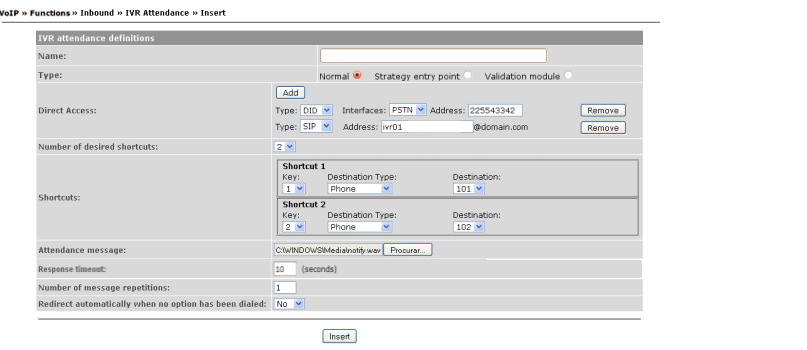
In this section it's possible to define interactive answering menus (Figure 4.82). You need to click Insert to add a new one:
Name: Choose a name for IVR;
Type: Choose between, Normal, Strategy entry point or Validation module
Direct access: List of numbers/addresses that will call this service. We have three options and the possibility to use many direct accesses, it's also possible to choose one of the PSTN interfaces defined at: Telephony -> Interfaces;
DID: If the IPBrick has a ISDN telephony card, the PSTN DID (Direct Inward Dial) that will call this service needs to be inserted;
ANA: If the IPBrick has a analogic telephony card, will be the direct PSTN number that will call this service;
SIP: It's the specific SIP address that will call this service;
Caller IDs restriction: Will restrict the route only for the listed caller ID's;
Number of desired shortcuts: Choose how many options does the menu have;
Shortcuts: What type of destiny to give (according to the pressed key):
Phone: To call an internal telephone;
IVR: To go to an interactive answering sub-menu;
Conference: To connect to a conference;
Scheduler: To connect to a scheduler;
Group: To ring the telephones of a group;
Sequence: To activate an answering sequence;
SIP address: To call a SIP telephone;
DISA: It allows someone outside the central to connect as if he/she is directly connected to the central;
Call queue: To make the call enter a waiting line;
Callback: To make the call in the most cost-efficient method. For more information check the Callback section of this document.
IPBRConference: Type the key shortcut to access the IPBrick radio conference. You will need the Radio4IPBrick package in order for this feature to be operational.
Attendance message: It allows the selection of an answering message. It can be a .mp3 or .wav file;
Number of message repetitions: Number of times the attendance message is replayed;
Response timeout: Time that the user has to choose an option, after they heard the message. By default 10 seconds
Redirect automatically when no option has been dialed: As Yes if no DTMF pressed it can redirect the call directly to:
Phone: To call to an internal telephone;
IVR: To go to an interactive answering sub-menu;
Conference: To connect to a conference;
Scheduler: To connect to a scheduler;
Group: To ring the telephones of a group;
Sequence: To activate an answering sequence;
SIP address: To call a SIP telephone;
DISA: It allows someone outside the central to connect as if he/she is directly connected to the central;
Call queue: To make the call enter a waiting line;
Callback: To make the call in the most cost-efficient method. For more information check the Callback section of this document.
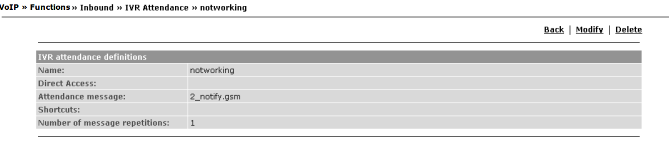
An IVR can have only an attendance message without any shortcut or direct access, e,g.: A message just saying that the company is closed, so that IVR can be used at the scheduling, for example (Figure 4.83).
Call Conference
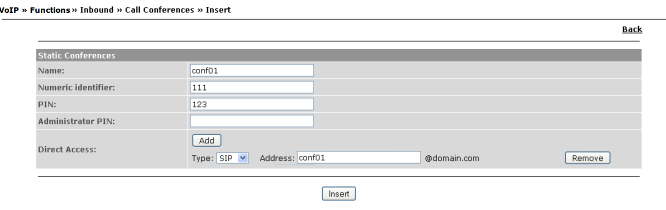
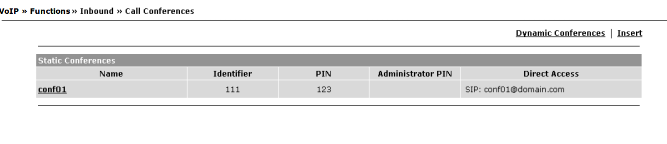
In this interface (Figure 4.84) is possible to create conferences. To create a simple static conference just click Insert:
Name: The conference name;
Numeric identifier: Numeric identifier for the conference. It's only a internal identifier for the VoIP server;
PIN: Code which shall allow the users to connect to the conference;
Administrator PIN: Conference code for the administrator;
Direct access: List of numbers/addresses that will call this service. We have three options and the possibility to use many direct accesses, it's also possible to choose one of the PSTN interfaces defined at: Telephony -> Interfaces;
DID: If the IPBrick has a ISDN telephony card, the PSTN DID (Direct Inward Dial) that will call this service needs to be inserted;
ANA: If the IPBrick has a analogic telephony card, will be the direct PSTN number that will call this service;
SIP: It's the specific SIP address that will call this service.
Caller IDs restriction: Will restrict the route only for the listed caller ID's;
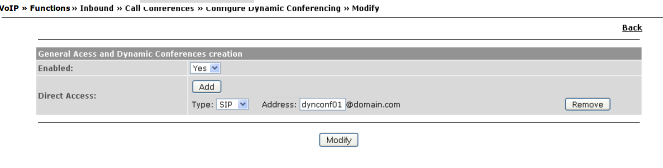
It is also possible to allow the creation of dynamic conferences. For that, it is necessary to click Dynamic Conferences (Figure 4.85), modify the option Active to Yes and insert the address(es) and/or number(s) for the Direct Accesses (Figure 4.86). At dynamic conferences, when someone calls to the direct access it's possible to enter automatically an existant conference or to create a new one.
Call Parking
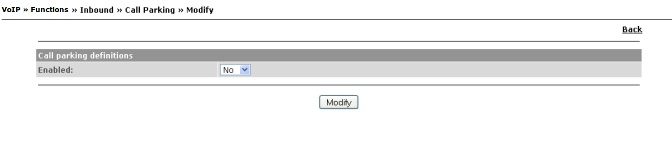
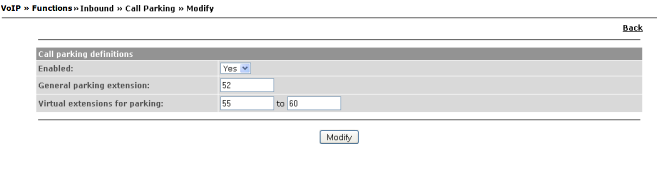
Here (Figure 4.87) it's possible to activate or deactivate the option of calls on hold.
If this option is activated, it is necessary to define an extension to place the calls on hold, as well as the virtual extensions in which calls are going to be placed (Figure 4.88). To access these calls later it's necessary to press on the telephone keypad the "#" plus the virtual extension were the call was parked.
Scheduling
This option (Figure 4.89) allows you to define the daily behavior of the IP PBX. Usually this is the most important inbound service because from here, we are able to call all the other configured services.
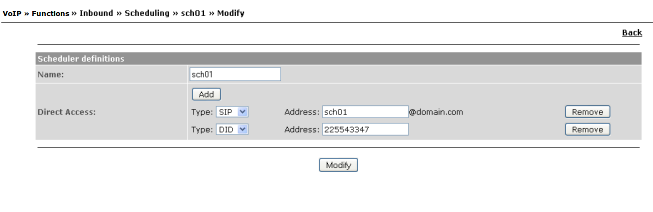
It is necessary to click option Insert (Figure 4.90) and configure the first parameters:
Name: The name for the scheduler;
Direct access: List of numbers/addresses that will call this service. We have three options and the possibility to use many direct accesses, it's also possible to choose one of the PSTN interfaces defined at: Telephony -> Interfaces;
DID: If the IPBrick has a ISDN telephony card, the PSTN DID (Direct Inward Dial) that will call this service needs to be inserted;
ANA: If the IPBrick has a analogic telephony card, will be the direct PSTN number that will call this service;
SIP: It's the specific SIP address that will call this service.
Caller IDs restriction: Will restrict the route only for the listed caller ID's;
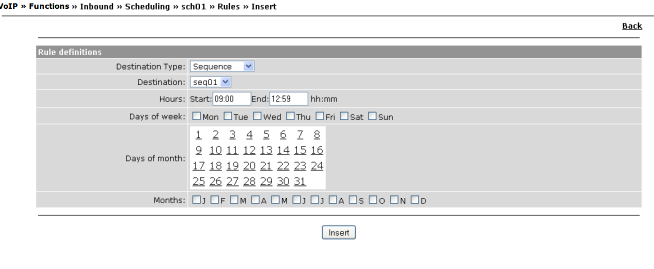
Next, it is necessary to add rules for this scheduler. For that:
Insert;
Fields explanation:
Destination type: Where shall the call be routed if the rule defined next is equalled. Options:
Phone: To call to a internal telephone;
IVR: To go to an interactive answering sub-menu;
Conference: To connect to a conference;
Scheduler: To connect to a scheduler;
Group: To ring the telephones of a group;
Sequence: To activate an answering sequence;
SIP address: To call a SIP telephone;
DISA: It allows someone outside the central to connect as if he/she is directly connected to the central;
Call queue: To make the call enter a waiting line;
Destination: Telephone address or specific service name were the call shall be routed;
Hours: Beginning and end hour, from the timetable in which the rule shall be valid (format hh:mm at each field);
Weekdays: Weekdays in which the rule shall be valid. If not chosen it will use all days;
Month days: Days of the month in which rule shall be verified. If not chosen it will use all;
Months: Months in which the rule shall be valid. If not chosen it will use all months;
NOTE: If you don't select any hour or days of the week/month, hour or months, the rule shall be valid respectively for all the day. A rule like this one is called the default rule;
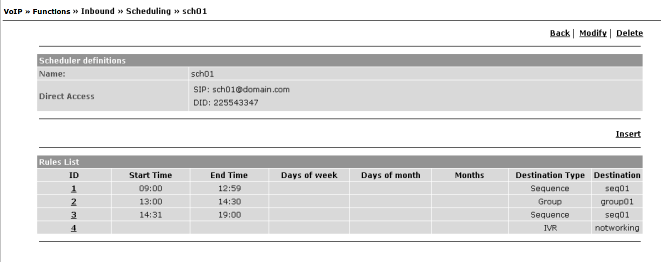
At Figure 4.91 we can see an example of a scheduling implementation. You can see that the rule 4 is used from 19:01 to 08:59, because is the default time. It will call a simple IVR with a voice message telling that nobody is at the company to answer the phone.
DISA
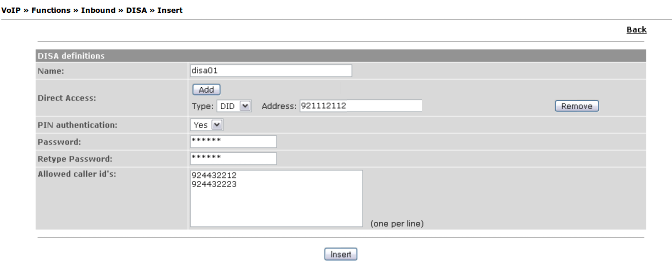
DISA4.20 (Figure 4.92) is a service that allows that someone that is not directly connected to IPBrick or the PBX central, to obtain an internal call sign and execute calls as if he/she was directly connected to the internal network. The user calls the access number to DISA and he/she should type a password followed by the key "#". If the password is correct, the user shall hear the sign indicating that he/she may dial the number. You can also enjoy this service without a password if you want to. The fields necessary to configure a DISA are:
Name: Name for DISA;
Direct access: List of numbers/addresses that will call this service. We have three options and the possibility to use many direct accesses, it's also possible to choose one of the PSTN interfaces defined at: Telephony -> Interfaces;
DID: If the IPBrick has a ISDN telephony card, the PSTN DID (Direct Inward Dial) that will call this service needs to be inserted;
ANA: If the IPBrick has a analogic telephony card, will be the direct PSTN number that will call this service;
SIP: It's the specific SIP address that will call this service.
Caller IDs restriction: Will restrict the route only for the listed caller ID's;
PIN authentication: It allows the introduction of a password to enable the dialling through DISA;
Password: PIN password;
Allowed caller ID's: Callers identifiers list which may accede to this service. Insert only one by line.
Callback
Callback feature have the main objective to save costs on internacional calls. It allows people to call to the IPBrick callback service, the IPBrick will hangup the call and call back to that number that made the call. That callback usually will be made using a VoIP operator SIP account, so with a low cost.
When inserting a callback, the available options are:
Name: Name for the Callback;
Direct access: List of numbers/addresses that will call this service. We have three options and the possibility to use many direct accesses, it's also possible to choose one of the PSTN interfaces defined at: Telephony -> Interfaces;
DID: If the IPBrick has a ISDN telephony card, the PSTN DID (Direct Inward Dial) that will call this service needs to be inserted;
ANA: If the IPBrick has a analogic telephony card, will be the direct PSTN number that will call this service;
SIP: It's the specific SIP address that will call this service.
Caller IDs restriction: Will restrict the route only for the listed caller ID's;
Callback type:
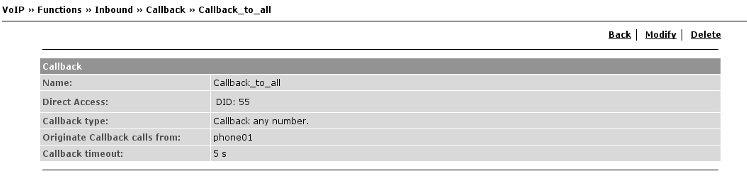
Callback any number: No matter the number that made the call, the call will be finished, will ring a defined internal phone and when someone answer the phone will be made automatically a callback to the origin number (Figure 4.93);
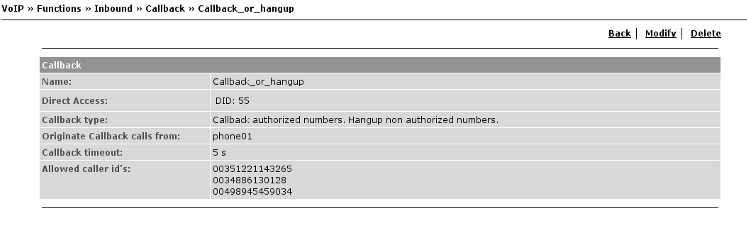
Callback authorized numbers. Hangup non authorized numbers: For authorized origin numbers, the call will be finished, will ring a defined internal phone and when someone answer the phone will be made automatically a callback to the origin number. For unauthorized numbers, the call will be just finished (Figure 4.94);
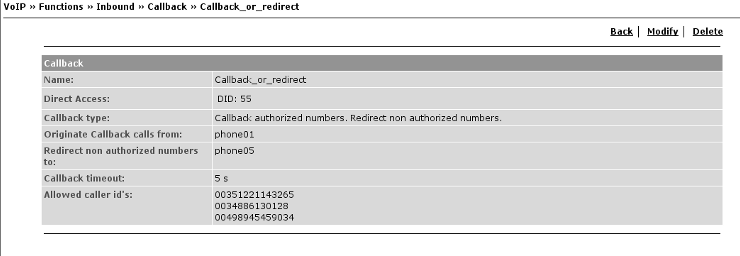
Callback authorized numbers. Redirect non authorized numbers: For authorized origin numbers, the call will be finished, will ring a defined internal phone and when someone answer the phone will be made automatically a callback to the origin number. For unauthorized numbers, the call will be redirected to a internal phone (Figure 4.95).
Originate Callback calls from: It's the internal phone that will ring and callback the origin number;
Redirect non authorized numbers to: Internal phone where the calls will be redirected. Used only for callback type 3;
Callback timeout: Pause in seconds from the momment tha call is termined and called back, so the person that makes the call can have time to hangup the phone. The default is 5 seconds;
Allowed caller id's: Will be the authorized origin numbers list. Used for callback type 2 and 3.
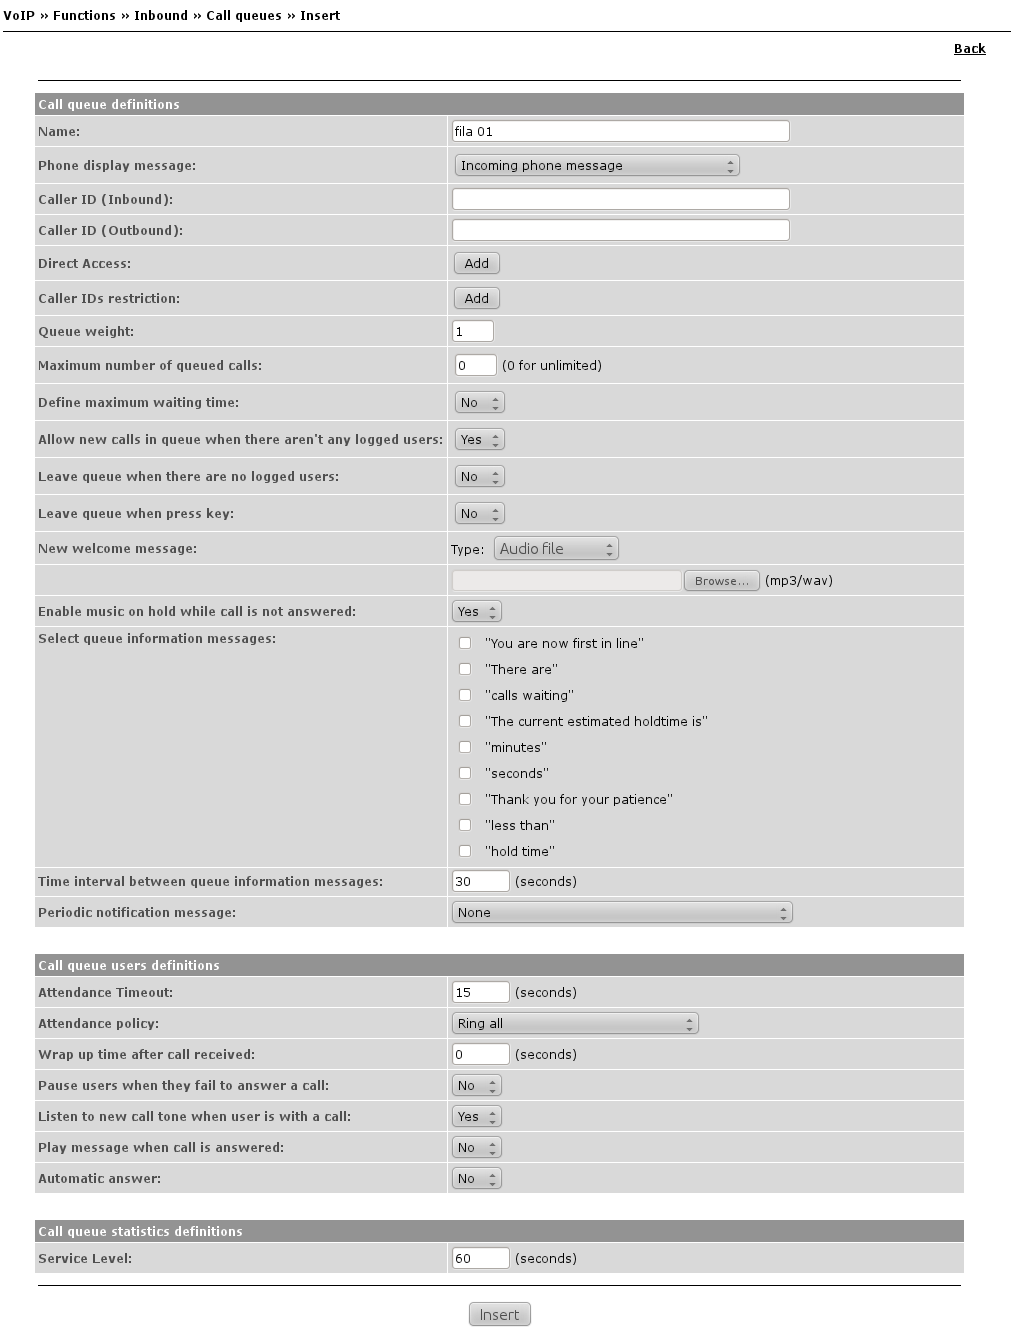
Call queues
Here (Figure 4.96) it is possible to define waiting queues. When calling to the telephone defined in Direct Access the caller shall be placed on hold if there is another call to be answered. An answering message may be defined which shall be heard when the call is on hold. It is also possible to choose messages by default in Select queue information from the line which may inform the caller about his/her position in the line and the time interval between those messages.
The visible settings when we hit insert are these:
Name: Name of queue;
Phone Display Message: You may opt to display several messages: Incoming number, Incoming number and Queue name, Queue name and Incoming number and finally you may create a Custom message;
Caller ID (Inbound): Possibility to use a specific inbound caller ID for this service;
Caller ID (Outbound): Possibility to use a specific outbound caller ID for this service;
Direct access: List of numbers/addresses that will call this service. We have three options and the possibility to use many direct accesses, it's also possible to choose one of the PSTN interfaces defined at: Telephony -> Interfaces;
DID: If the IPBrick has a ISDN telephony card, the PSTN DID (Direct Inward Dial) that will call this service needs to be inserted;
ANA: If the IPBrick has a analogic telephony card, will be the direct PSTN number that will call this service;
SIP: It's the specific SIP address that will call this service.
Caller IDs restriction: Will restrict the route only for the listed caller ID's;
Queue weight: Queue's priority.
Maximum number of queued calls: Maximum number defined of calls on hold. '0' defines an unlimited number;
Define maximum waiting time: It is possible to define the maximum waiting time. For that it is necessary to click option Yes, select the maximum time in seconds and the type of routing to do if the time is exceeded as well as the final destiny;
Allow new calls in queue when there aren't any logged users: Even if there's an empty queue you may Forward the call and select its Destination
Leave queue when there are no logged users: The call wil leave the queue if there's no users available. By default, this option is inactive;
Leave queue when press key: By default, NO. If you select YES a new option to create a Shortcut will appear. Please insert the Key, select the Destination Type and Destination. The Remove button enables you to delete the Shortcut;
Current welcome message file: Visualizes the current message to be presented when someone enters the waiting line;
New welcome message: Select the message to be presented when someone enters the waiting line, choose the Type and click on Browse to select it;
Select queue information message: Select some of these messages to inform about the position in the waiting line or the estimated waiting time. Messages: "You are now first in line", "There are", "calls waiting", "The current estimated holdtime is", "minutes", "seconds", "Thank you for your patience", "less than" ,"hold time"
,"All phones busy / wait for next";
Time interval between queue information messages: If some informative message is selected, is possible to select the time (seconds) between messages;
Periodic notification message: This option helps you to define a custom periodic message on voip call queues. By default, NONE. Other options include: All phones busy/wait for next (the default message), the ability to upload a new periodic notification message file (mp3 or wav only) and the time interval between this periodic messages, by default, 60 seconds ;
Time interval between periodic notification messages:
Attendance timeout: Period of time (seconds) at the end of which the caller shall be put on hold if the call is not answered, even if there is no one else on hold;
Attendance policy: How the waiting line answering telephones should answer the calls:
Ring all: All available telephones ring until one of them answers;
Random: One of the available telephones rings by chance;
Round Robin: Each telephone rings at the time;
Round Robin with memory: Each telephone rings at the time, but it remembers which was the last one to ring;
Least recently called phone: The call goes to the member that for the longest time hasn't answered;
Phone with fewest completed calls: Will ring the telephone with less answered calls.
Wrap up time after call received After the call is answered this option sets the time By default, 0 seconds;
Pause users when they fail to answer a call: By default, this option is set to No. If enabled the user who can't answer a call will be paused;
Listen to new call tone when user is with a call This option will change the call tone if the user is busy. By default this otion is set to Yes;
Play message when call is answered: If Yes a message will be played before the call is answered;
Automatic Answer: By default No. If active it enables auto-answer for agents in callqueues
Service Level: Service level describes, usually in measurable terms, the services a call center service provider furnishes a customer within a given time period. In call center metric, service level measures the percentage of incoming calls that an agent answers in an established amount of time. By default 60 seconds.
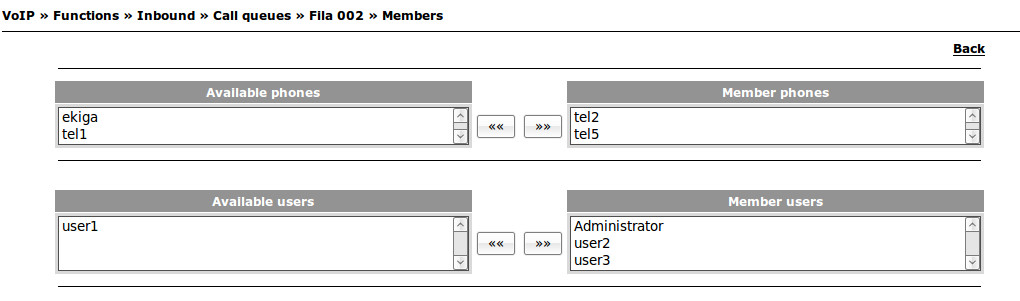
When a call queue is inserted there are the following options at the top: Back, Modify, Delete and Members. So the next step is to define what IP phones or/and LDAP users will be associated to the call queue. Clicking Members you will get a list of phones and users, like shown at Figure 4.97.
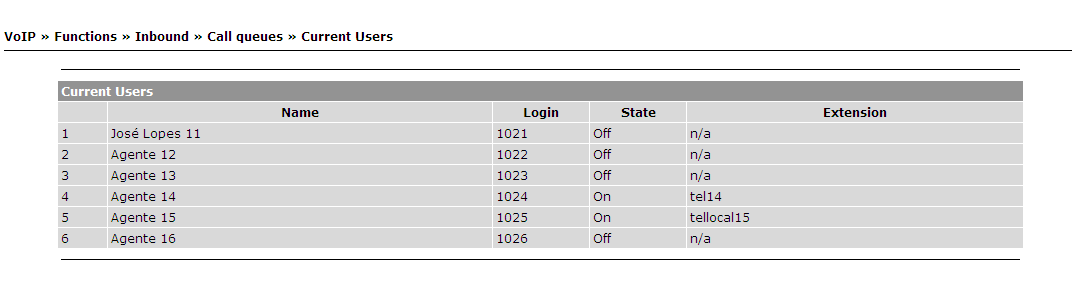
Current Users
At this page (Figure 4.98) you will be able to visualize a table with all the current users by Name, Login, State and Extension.
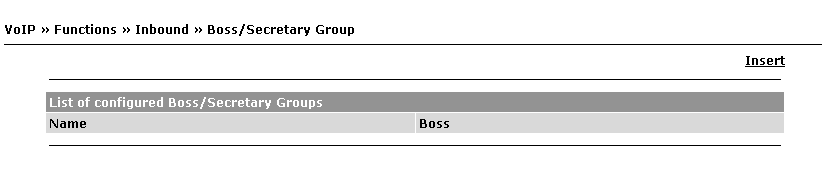
Boss/Secretary Group
This feature enables you to configure important aspects in the Boss/Secretary communications.
You will be able to set which users, or phones, will be 'bosses' or 'secretaries' and add priority numbers (numbers who will ring in the same manner on both the secretary and boss' phones).
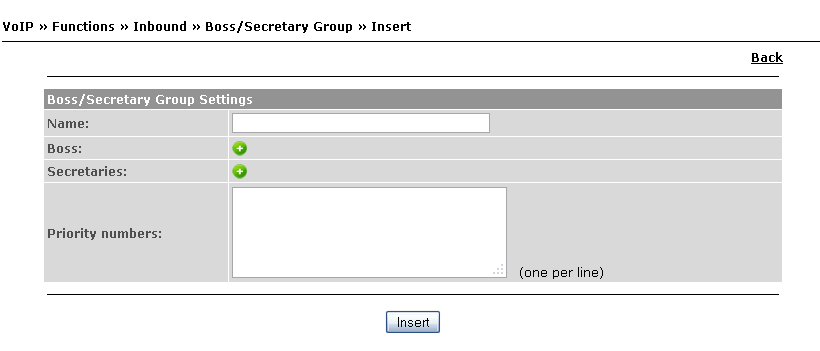
At the Boss/Secretary Group page (Figure 4.99) click on Insert.
At the new Insert page (Figure 4.100) you will have these options available:
+ icon will open the boss' options into two pop-down lists:
Phone or a User. If you select phone you will assign a particular phone to a boss. If you select user you will assign all the user's associated phone settings (ie: phones, aliases) configured at the VoIP user's management;
+ icon will open the Secretary's options into two pop-down lists:
Phone or a User. If you select phone you will assign a particular phone to a secretary. If you select user you will assign all the user's associated phone settings (ie: phones, aliases) configured at the VoIP user's management;
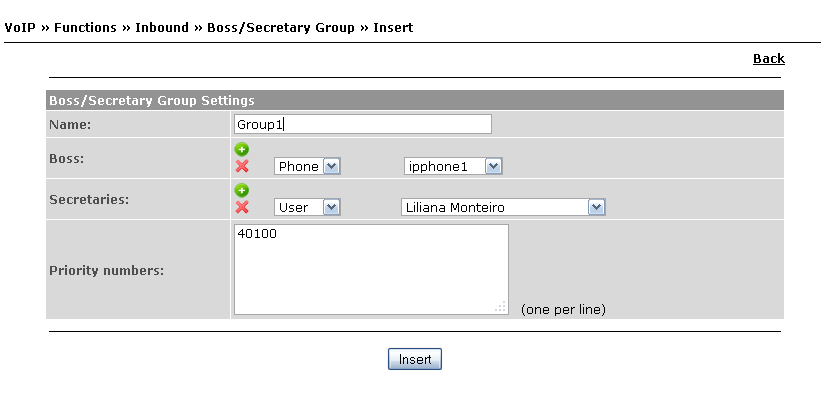
The example on Figure 4.101 shows a Boss/Secretary Group named Group1 configured in a way that, the boss' phone will be the ipphone1 and his secretary will be the user Liliana Monteiro. The secretary's phone(s) will depend of the settings made at:
VoIP > Users Management
The number 40100 will be a priority number, ringing in the same manner on both phones.
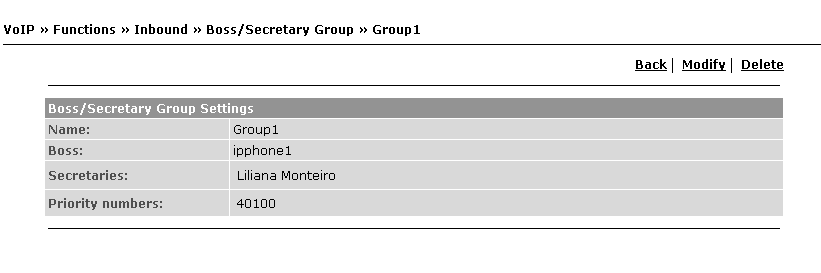
Click on the Insert button to save the Boss/Secretary group settings (Figure 4.102).
