Next: Machines Up: Subnets Previous: Subnets Contents
Back and Insert a new connection.
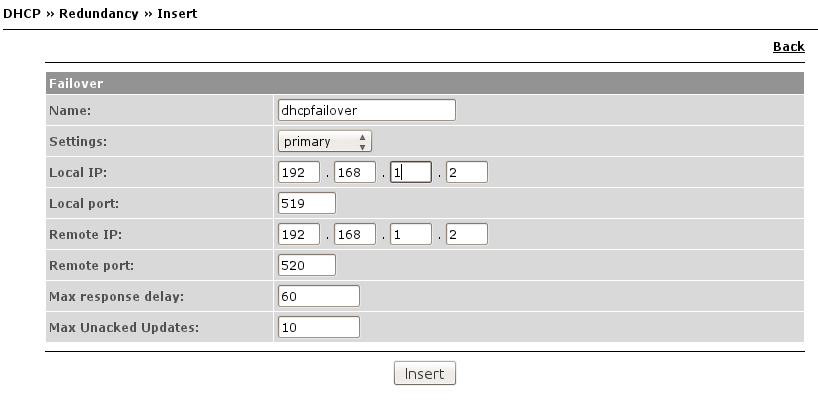
The following fields are presented in the insertion of redundancy and fault:
Name: Name of the redundant connection;
Settings: here you can see if the server is the primary or secondary DHCP;
Local IP: Servers internal IP address;
Local port: Local port where the service is running;
Remote IP: Remote IP address from the server of the other extreme;
Remote port: Remote port where the service in the other extreme is running;
Max response Delay: Max time that the DHCP server can wait for a message from the other peer. When that is out, the server assumes that the other has failed and assumes itself as the network DHCP server;
Max Unpacked Updates: Max Unpacked Updates (BNDUPD) non-confirmed that the server can receive from other peer.
General Options
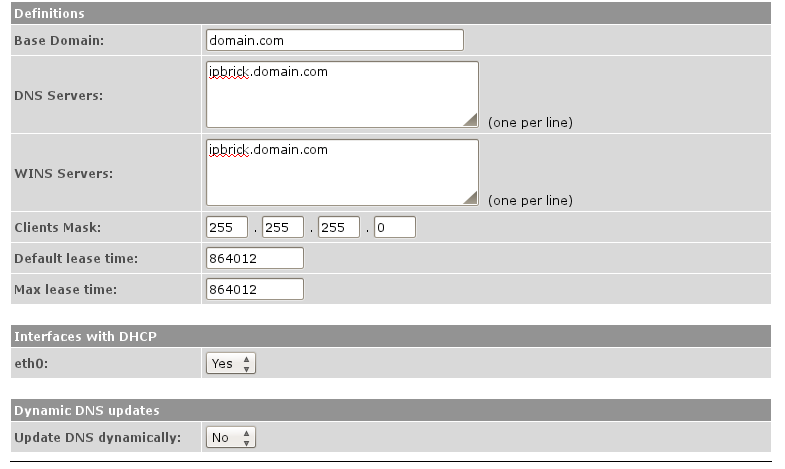
This option (Figure 7.47) allows the insertion of general DHCP parameters, which shall be attributed by default to the clients:
Base domain: Domain where the DHCP is operating;
DNS servers: DNS servers to be used by the DHCP server;
WINS servers: WINS servers to be used by the DHCP server;
Clients mask: Mask to be used by the clients of the DHCP service;
Default lease time: Default lease time during which the 'lease' of the address is valid for the clients;
Max lease time: Max lease time of an IP address for the machines. When this value is surpassed, the IP address is renewed.
Interfaces with DHCP: eth0 - By default, YES
Dynamic DNS updates: Update DNS dynamically - By default, NO If you want the DNS Dynamic Update, it is necessary to choose "Yes" in the respective box. This feature is used to update dynamically a machine's IP in the DNS record (if that machine is not registered with its MAC address) at Figure 7.47 you may visualize the Dynamic DNS update 'Yes' form.
Note: It is possible to visualize the leases of the DHCP at:
Advanced Configurations -> Support services -> DHCP -> DHCP Leases
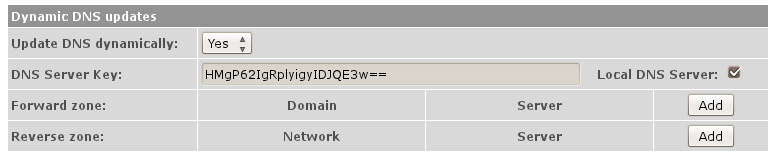
DNS Server Key: Your DNS local or remote server key;
Local DNS Server: By default this box is ticked, If it is a remote DNS server remove the tick on this box;
Forward zone: Click on the add button to add a Forward zone and fill with the domain name and server IP;
Reverse zone: Click on the add button to add your network and server IP.